What is the SlingStudio Chroma-Key feature?
With the chroma-key feature in SlingStudio Console, you can composite (put together) two video streams using a single color in the foreground video to serve as an area on which to display the background image.
You've likely seen this done on television weather programs. The weather reporter stands in front of a screen of a uniform color; the weather map is then composited over that colored screen to form a single video image. The two video images together appear to show the weather reporter pointing to the map.
You can composite both live video sources and motion graphics
The SlingStudio Console chroma-key feature works with two broad categories of sources:
- Live video;
- Motion graphics that are suitable for the chroma-keying process.
Motion graphic files can be incorporated into your project by importing them with the SlingStudio Console import video clips feature.
You can also use a computer that's displaying suitable motion graphics. The computer's HDMI output can be connected to the SlingStudio unit either via the SlingStudio unit's HDMI-In port, or via a SlingStudio CameraLink device.
Whichever method is used, the motion graphic is used as a video source, and the methods for compositing it via the Chroma key feature are the same as with live video.
You can create motion graphics with a variety of tools, including:
- Adobe Premier
- Adobe After Effects
- Apple Final Cut Pro
- Camtasia
Note: The SlingStudio Console chroma-key feature supports keyed motion graphics, not alpha layered motion graphics.
What do I need?
To use the SlingStudio Console chroma-key feature successfully, you need to choose a video source for the foreground that includes an area that is a single, uniform color. A section of wall can serve this purpose. This uniformly-colored portion of the foreground video image is what you'll use for compositing the background video image onto it.
Lighting is extremely important. Your best bet is to try to get your lighting as even as you can. This can help reduce the need for adjustments later.
Specifically, try to light both your foreground and your background video sources (but especially the foreground source that contains the solid color that you are keying to) so that it has even, relatively bright lighting that casts as few shadows as possible. Careful lighting setup makes it far easier to get the best possible results without having to adjust chroma-key settings (or do post-production work) later.
After the foreground video source is ready, you'll then need the background video that you want to composite over the foreground video. Once you have at least those two video sources set up, you can create your chroma-key composite video.
Of course, you can also set up other video sources (unrelated to the chroma-key process) as you need.
Setting up the Chroma key feature in SlingStudio Console for Mac
To use the Chroma key feature:
- Using SlingStudio Console for Mac, create a new SlingStudio project with the settings that you wish.
You can also open an existing SlingStudio project if you prefer. - Set up the foreground video source:
- Use a camera (connected via CameraLink or the SlingStudio unit's HDMI-In port), iPhone/iPod touch, Android smartphone, or an imported video clip—it's your choice.
- Compose the image so that a portion of it consists of a large, uniform, solid color.
- Set up a background video source:
- As with the foreground source, you can use a camera (connected via CameraLink or the SlingStudio unit's HDMI-In port), iPhone/iPod touch, Android smartphone, or an imported video clip.
- Compose the background video image that you want to composite onto the solid-colored area of the foreground video source.
- If you wish, set up other video sources that are unrelated to the chroma-key process.
- In SlingStudio Console for Mac, confirm that you can see the foreground and background video sources that you want to use for your chroma-key composite.
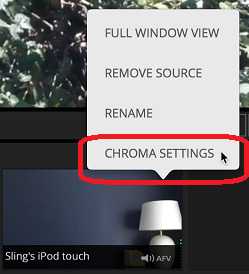
IMPORTANT: You cannot use an image as a chroma-key foreground video source if it is in either the Preview or Program windows. If you inadvertently place the foreground video source in Preview or Program, remove it by clicking the background video source to place it in Preview instead. - For the foreground video source: Move the trackpad/mouse pointer into the upper-right corner of the source's thumbnail image, and then click the three dots icon [...] to display the options for the foreground video source.
- In the pop-up menu that appears, click CHROMA SETTINGS.
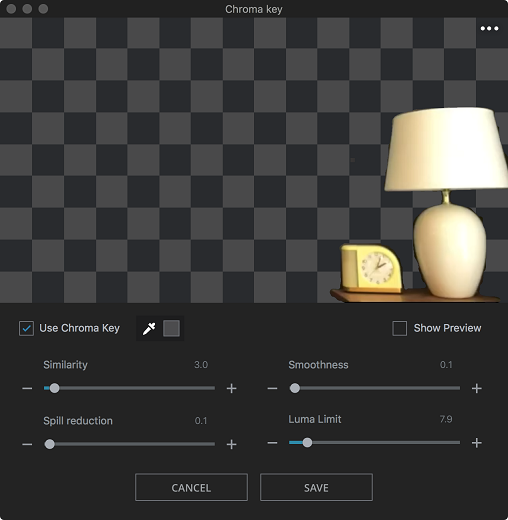
The Chroma Key dialog box appears.
- Click to select Use Chroma Key, then click the eyedropper icon.
- Click the area of the image that contains the color that you want to use as the key to composite your background and foreground video sources.
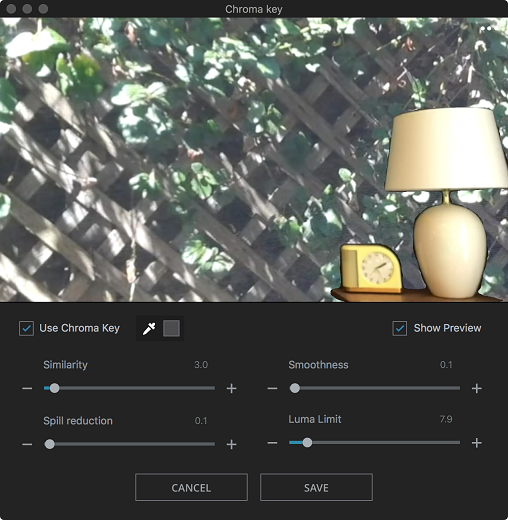
- To adjust your composited image further, click Show Preview.
- If you see the composited image (foreground and background) then skip to Step 16.
- If you don't see both images when you click Show Preview, continue with the next step.
- Click SAVE.
Note: Your image may not look the way you want ... that's okay. Save it for now, and then you can adjust it in a moment. - In the SlingStudio Console main window, click the background video source image to place it in the Preview window, if it's not there already.
- Use your trackpad/mouse pointer to drag the foreground video source thumbnail onto the background video source in Preview.
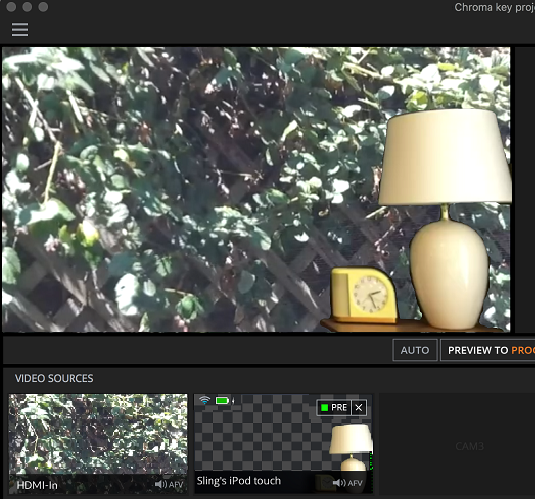
The two images composite.
- Now go back to adjust the chroma-key settings: Click the [...] icon for the foreground video source, then click CHROMA SETTINGS.
The Chroma Key dialog box opens again. - If you wish, click Show Preview to see the composited chroma-key image as you fine-tune the settings.
- Use the sliders to adjust the Chroma key settings:
- Similarity: Lets you choose how broadly (or narrowly) the Chroma key feature should include colors similar to the one that you've chosen as your chroma-key. Set too low, your background image won't show through properly; set too high, and foreground features that you want to keep show the background image.
- Spill reduction: Helps remove the colored tinge around the foreground image, often caused by light reflecting off the solid-color surface that you're chroma-keying to. If adjusting this setting doesn't help sufficiently, try using a solid-color background that is less-reflective. You can also try adjusting your lighting so that it is more even, especially behind the subject.
- Smoothness: Adjust as needed to improve the blend of colors that are keyed out. This can be helpful when you want to keep colors that are fairly close to your chroma-key color.
- Luma limit: This setting is helpful when your video source has mostly white and black components with varying intensity. If you wanted to key out black-toned areas of your foreground source while keeping the lighter areas, this setting would help you do that.
- In the upper-right corner of the CHROMA KEY dialog box, you can click the [...] icon to see the FULL WINDOW VIEW option.
- When you're done, click SAVE.
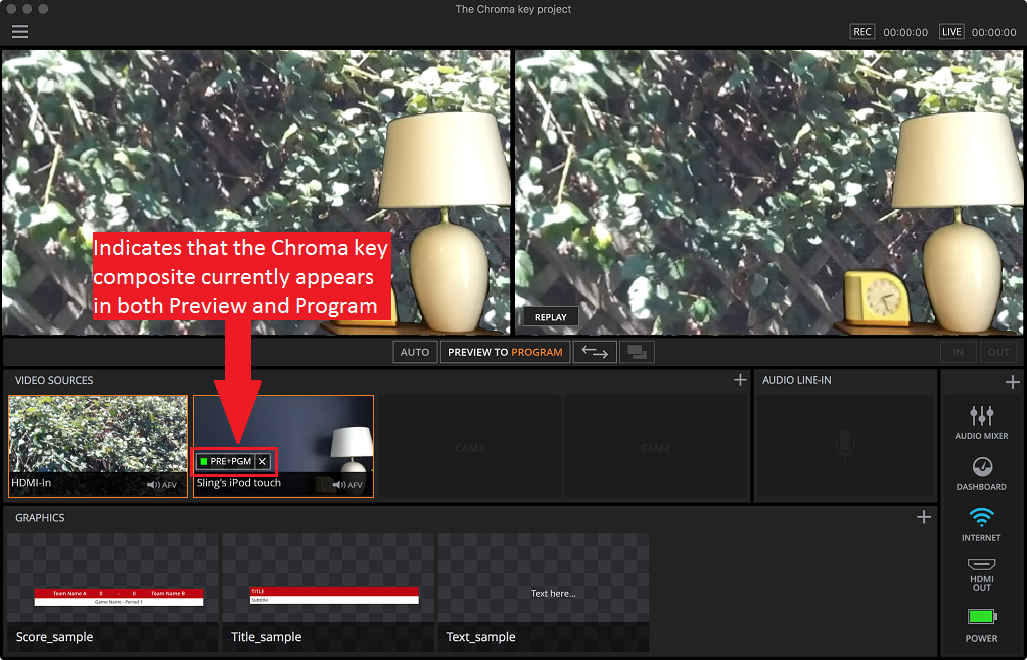
Note that a small icon with a tiny green square in the lower-left corner of the foreground video source's thumbnail image (in the VIDEO SOURCES column) indicates whether the composited video is currently in Preview ( PRE), Program ( PGM), or both ( PRE+PGM).
Click this icon to remove the video source from Preview, Program, or both.
